
ROGOMOVE has both human players and AI characters
We added bots to bring towns and maps to life, help start parties, support hunting and provide activities while friends are still gathering. Bots are system-controlled characters with different capabilities for each role.
Human players and AI/bots are shown separately when current data is available. The total includes both groups. If data is unavailable, the count is shown as unknown. Bot numbers are never described as human players.
This guide explains each type's capabilities. Some services await an opening announcement. Check the relevant status label and activity schedule before using them.
Each has a reason to travel
Choose a suitable target
Bots choose training areas based on level, capabilities, manageable monsters and walkable routes. They consider player and bot density plus other bots' planned destinations to spread area choices. Bots are not guaranteed on every map or at every time.
Party bots consider weaker members too. Parties can include bots and human players when eligible. Players are not moved out of an area to manage bot numbers.
Hunt, rest and return to adventure
Beginners focus on training around towns and take shorter town rests. Starting bases are spread across Prontera, Izlude, Geffen, Payon, Morroc and Alberta, using manageable routes. Each bot alternates between town rests and hunting at its own pace. A typical world session lasts about 45–120 minutes, followed by about 20–90 minutes of rest. Combat, saving and parties may delay the end of a session.
New characters begin as low-level Novices. Existing characters retain experience and class instead of restarting each session. Visible numbers therefore vary with timing and each bot's readiness.
Sometimes return to easier maps for materials
When level and abilities permit, some bots choose monsters with relevant materials rather than choosing maps only for EXP. Beginners prioritize training. Gathering materials currently guides travel and target selection; a complete system for persistent material inventory, quota deliveries and automatic material sales is not available.
When danger appears, bots choose to fight or retreat
Adventure bots check nearby bosses and attacking enemies before resting or traveling, assessing level, HP, fighting strength and nearby party members. Some capable bots help fight; those at risk stand up and retreat. Response timing varies, so they do not all swarm at once. MVP bosses allow shared combat under game rules; ordinary enemies respect who started attacking.
After death, bots return to their home base. Some capable bots rest and walk back through map entrances to help, checking that the boss remains and the route is suitable. Retries are limited to avoid endless deaths. Skills and damage still follow actual game rules. This assessment does not guarantee a boss victory or replace your party members.
Monsters spawn according to the map rules.
Monster spawn points and cycles belong to each map. They do not increase directly with the area's population, so more bots do not automatically mean more monsters on every map.
The targeting system is active, but distribution takes travel time and session changes. It does not instantly populate every area. Some starting areas remain denser than their targets and are being monitored. Website counts continue to separate human players and bots using measured totals.
Plan your route and explore monsters →Bots have individual identities
Names, hairstyles and outfit colors
Adventure bots retain character-specific hairstyles, hair colors, outfit colors and preferences instead of rerolling at every save. Generic names ending in long numbers are replaced with readable names, including resting older bots, while custom names remain intact. War bots use [GW] followed by a Thai or English name without a trailing sequence number. Names are retained across game sessions.
The artwork supports 42 hairstyles, 17 hair-color levels and 21 outfit-color levels. Visible variation depends on class and supported game artwork; every character cannot necessarily use every style.
Equipment based on class and level
Bots have different equipment preferences, from basic to good gear, while respecting class, sex and level requirements. Each piece has its own refinement, mostly +0 to +5, with some weapons reaching +7. They do not all wear the same strongest set.
Adventure bots select Costumes from the server's existing items, combining head, face and garment pieces when their class and level permit. Some wear several pieces while others dress simply. These fashions do not add bot combat power. War bot appearances and equipment follow separate requirements.
Carts, birds and mounts follow real requirements
Merchants use carts after learning Push Cart, with styles allowed by their level. Hunters have a bird after learning Falcon. Knights and Crusaders need Riding and must activate their mount. Among eligible bots, preferences are designed around 58% riding Peco and 42% walking. These describe selection preferences, rather than a guaranteed visible population ratio at every moment.
Some bots use mounts in town or while traveling and dismount before hunting or combat. Others have following pets, including familiar types and cats from the server's existing collection. Bot pets do not add combat power or collect items for players. Visible numbers vary with online characters, and appearance depends on installed game resources.
Situational conversations are active
Bots respond to public, party and whisper chat based on context, with reply timing, recent-message memory and cooldowns. Thai polite endings vary with sex and personality. Without a nearby human player or one in the same party, a bot may remain silent. Responses use situational rules rather than an external conversation service.
If a class appearance, outfit color or equipment looks incorrect, report the bot name, map and time to the team. In-game appearance may vary with installed resources.
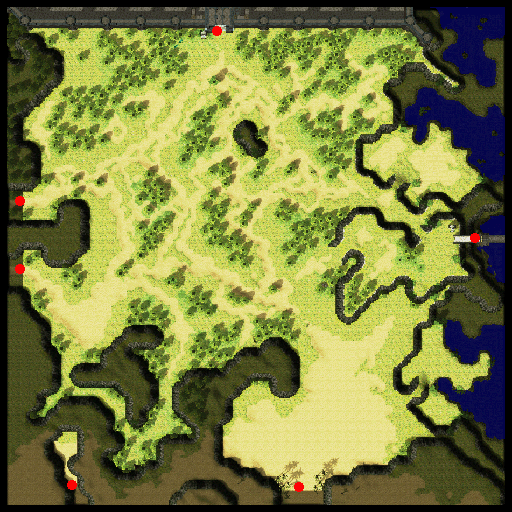 Hunting around town
 Novice
 Archer
 Poring
World adventurer bots
Bring life to towns and hunting areas, with adventurers to meet along the way.
What they can do
- Walk, travel, rest and hunt monsters according to character behavior.
- Fight using attacks and skills appropriate to the class role.
- Gain experience and progress through the bot system, without completing NPC class-change quests as players do.
How to get started
Encounter them during your travels without summoning a personal helper. These bots follow their own lives in the game world.
Conditions to know
- These characters are controlled by game AI and counted separately from human players.
- They do not accept quests or deliver items for you, and do not have every player capability.
- Seeing a character hunting does not mean it can trade or converse like a person.
 Swordman
 Mage
Mage Priest
Party companion bots
Fill roles while friends are still gathering, making it easier to begin hunting as a team.
What they can do
- Some characters wait to join parties and accept invitations when eligible.
- Combat bots assist with hunting, while priest roles follow and support members.
- Follow party members within distance and area restrictions.
How to get started
Choose a bot waiting for a party in town and invite it through the in-game party menu. Check your member count first.
Conditions to know
- When a bot accepts an invitation, the party is limited to 8 members including players and bots.
- Not every bot you see walking is ready to join a party.
- EXP sharing and reward eligibility still follow party rules. Adding a bot does not automatically grant extra free items.
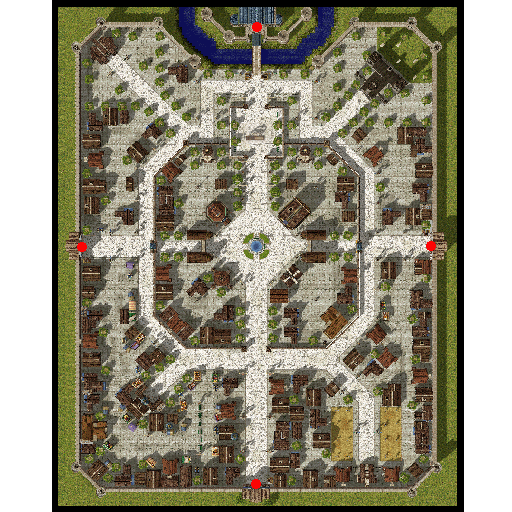 Prontera 183/125
 The Nun
Personal priest helpers · disabled
Help beginners return to adventuring while preserving the role of human Acolytes / Priests in parties.
What they can do
- Limited first aid and quest guidance for Novice and first classes at levels 1–40. Personal priest helpers remain disabled.
- First aid restores HP up to 30% of maximum HP. It does not add another 30% or fully heal you.
- Automatic following, healing, buffing and resurrection helpers remain disabled.
How to get started
Find The Nun at Prontera 183/125 using /navi prontera 183/125. Be alive and within 5 tiles. Choose first aid when HP is below 30%, or read quest guidance with Alt+U. Invite a human Acolyte / Priest to your party for further support.
Conditions to know
- First aid is limited to Novice and the first classes Swordman, Mage, Archer, Acolyte, Merchant and Thief at Base Levels 1–40. Second classes and other paths are excluded.
- HP recovery is available every 10 minutes per account. Changing characters does not reset the cooldown. Already having 30% HP does not consume a service use. It does not restore SP, buff or resurrect.
- Covenant of Faith (#61513) does not summon a personal helper. Your item, affinity and stamina remain preserved. Automatic party matching is unavailable.
- Paid warp priests remain a separate service with their own fees and destinations.
- The level range, HP percentage and cooldown are custom ROGOMOVE rules.
 Knight
 Acolyte
 Archer
Following combat and support helpers
Choose an AI companion role that suits your character's playstyle.
What they can do
- Choose an attack or support role through the helper menu.
- Summon, follow, send back to rest and inspect usage time.
- Helper capabilities depend on the character and selected type.
- Manage affinity, stamina, food and gifts.
How to get started
Check your VIP eligibility, then type @pt to inspect status and manage equipment. Use @t-Spawn to summon or dismiss the helper; @t-attack for attack mode, @t-defend for defense, @t-buff for the buff menu and @t-switch to change the role when eligible. Check remaining time and stamina in the menu during use.
Conditions to know
- This helper system requires VIP and allows 1 helper.
- Summoning has a duration and cooldown; helpers are not unlimited at all times.
- This limit applies to following helpers, rather than the server-wide bot population or total party size.
Town and travel service locationsPriest Priest
Priest travel services
Help you travel from town to supported destinations.
What they can do
- Provide a warp service room with destination selection.
- Handle the service payment through trading.
- Open a Warp Portal after a destination is selected and service conditions are met.
How to get started
Find the town service room labeled Warp. Read the destinations and prices, then follow the priest's instructions.
Conditions to know
- A separate service from a personal following priest.
- Warps do not bypass quest requirements or dungeon access permissions.
- Choose only destinations offered by the service. Check the destination before paying.
 Merchant
 Red Potion
 Apple
AppleMerchant vending bots
Add basic goods and supplies to make the market lively while preserving player-to-player trade.
What they can do
- Vend listed goods in designated areas.
- Stores use Zeny or points depending on their type.
- Display goods and prices for inspection before buying.
How to get started
When the service is announced open, inspect its currency, unit price and quantity before buying.
Conditions to know
- System-operated stores, distinguished from human players.
- Goods and prices do not guarantee player market values.
- Not every rare item is offered, and stock is not guaranteed at all times.
 Merchant
 Jellopy
 Shell
ShellMaterial buying-store bots
Provide another outlet for hunting loot while the market has fewer buyers.
What they can do
- Offer buying lists organized by material group and area.
- Buy only listed items at the stated prices and quantities.
- Offer an outlet for farming loot within each store's budget.
How to get started
Check material names and IDs, requested quantities and prices in the Buying Store before selling.
Conditions to know
- Purchases have budgets and quantity limits. They do not buy everything without limit.
- These are not guaranteed market prices for selling to other players.
- Listings may change with each round and market availability.
 Knight
 Assassin
PvP practice bots
Try combat and practice skill timing in the arena.
What they can do
- Provide system-controlled opponents for practicing attacks and responses.
- Use movement and abilities suited to the assigned role.
- Keep practice separate from ordinary hunting through designated activity areas.
How to get started
Check the PvP map and scheduled round before joining. Read the area's rules and helper conditions.
Conditions to know
- AI practice opponents do not replace competition with human players.
- No guaranteed reward for defeating bots or farming points.
- Check rules and rewards for the activity open in that round.
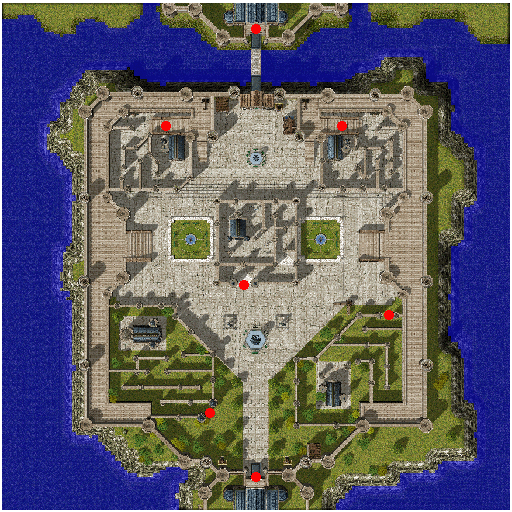 Prontera guild districtKnightPriestArcher
Guild War team bots
Add teams and roles to Guild War during scheduled rounds.
What they can do
- Characters have assigned guilds and combat roles.
- Move and fight according to guild activity objectives.
- Use attacks and skills assigned to the role.
How to get started
Read the Guild War schedule, active castles and round rules before gathering your team.
Conditions to know
- AI characters are distinguished from human guild members.
- Bots being present in town does not mean Guild War is always open.
- Bots are not guaranteed to strategize or negotiate like a human guild.
 SwordmanArcher
Two-Flag Battle
Watch two AI teams with different roles and combat rhythms.
What they can do
- Split into red and blue teams of 3 bots each.
- Fight in rounds within the arena.
- Provide NPCs and team signs for reading the rules.
How to get started
Check the round and rules at the Two-Flag Battle NPC at Prontera 156/125 or in the activity calendar before joining.
Conditions to know
- Both teams consist of bots, counted separately from human players.
- Conditions, costs and rewards follow the announced active round.
- An activity appearing in the guide does not confirm that its round is currently starting.
Priest travel services: choose a town and destination
Paid warp priests remain available · the table lists service locations, rather than online totals.
The network lists 30 service locations across 10 towns, each with 3 options: 90 service entries covering 27 distinct destinations. This table explains destinations and prices, rather than online bot numbers. It does not confirm that every location is currently available.
Warp to fields, towns or dungeon entrances. You must still enter normally and meet area requirements. Warps do not bypass Thanatos keys, Turtle access, boss quests or activity admission.
How do I use the service?
- Choose a town and service location below. Copy its Navigator command to find the priest, then check the Warp room name and in-game availability announcement.
- Enter the service room and read the three options. Type 1, 2 or 3 in the room chat and press Enter. The selected option determines the price and destination.
- Trade exactly the listed amount of Zeny, without adding items or extra money. Check the offer before both sides confirm.
- After payment, the priest casts Heal, Blessing and Increase AGI once, then opens a Warp Portal. You must walk through it yourself; payment does not instantly warp you.
What if I paid but missed the portal?
An unused trip belongs to the character that paid. When area conditions allow, return to the priest's room to reopen the same trip without paying again. Another character on the same account cannot use it instead. The trip is consumed when the buyer walks through the portal and reaches the destination.
The portal is brief: opening takes about 2 seconds and the default entry window is 8 seconds. The service room becomes available again after about 5–10 seconds. Announcements may change these timings. Others may share the portal, but cannot consume the buyer's trip entitlement on the buyer's behalf.
The service does not restore SP or grant extra free buffs every time an existing trip is reopened. If the game fails or disconnects during payment, check your trip entitlement before paying again. Report the time, price and destination to the team. Refunds are not guaranteed in every case.
Expand a town to view all service points. Level ranges guide area selection; they are not minimum requirements or a guarantee of easy hunting for every class. /navi provides navigation rather than warping, and may not find a route across maps.
Prontera5 service points · 15 options · awaiting availability
Town prontera · these are warp service priest locations, rather than Priest class-change NPCs.
Town NPC: เควสแลกหมวก A–Z →Service point 1 · Begin adventuring
Location: prontera · X 174 / Y 93
1. Poring field south of Prontera
200 Zeny / trip
Suggested level: 1–20
Find monsters: prt_fild08 →
Destination: prt_fild08 · X 180 / Y 2502. Spore forest / beginner Payon route
300 Zeny / trip
Suggested level: 10–30
Find monsters: pay_fild01 →
Destination: pay_fild01 · X 180 / Y 2003. Wolf forest
500 Zeny / trip
Suggested level: 20–45
Find monsters: pay_fild02 →
Destination: pay_fild02 · X 151 / Y 219
Service point 2 · Beginner party gathering
Location: prontera · X 181 / Y 96
1. Payon Cave entrance / Archer Guild
500 Zeny / trip
Suggested level: 15–60
Destination: pay_arche · X 41 / Y 1312. Byalan Island / underwater entrance
500 Zeny / trip
Suggested level: 15–65
Destination: izlu2dun · X 107 / Y 953. Coal mine entrance
750 Zeny / trip
Suggested level: 25–60
Find monsters: mjolnir_02 →
Destination: mjolnir_02 · X 174 / Y 193
Service point 3 · Orc parties
Location: prontera · X 190 / Y 96
1. Orc Village / Orc Dungeon entrance
1,000 Zeny / trip
Suggested level: 35–65
Find monsters: gef_fild10 →
Destination: gef_fild10 · X 178 / Y 2182. High Orc field
1,200 Zeny / trip
Suggested level: 60–99
Find monsters: gef_fild14 →
Destination: gef_fild14 · X 211 / Y 1853. Goblin forest
750 Zeny / trip
Suggested level: 30–55
Find monsters: gef_fild11 →
Destination: gef_fild11 · X 208 / Y 190
Service point 4 · Dungeon hunting
Location: prontera · X 166 / Y 85
1. Glast Heim grounds / choose your dungeon onward
2,000 Zeny / trip
Suggested level: 60–99
Find monsters: glast_01 →
Destination: glast_01 · X 200 / Y 2912. Outside Clock Tower
1,500 Zeny / trip
Suggested level: 45–99
Find monsters: aldebaran →
Destination: aldebaran · X 140 / Y 1333. Field at the Magma Dungeon entrance
2,000 Zeny / trip
Suggested level: 70–99
Find monsters: yuno_fild03 →
Destination: yuno_fild03 · X 34 / Y 139
Service point 5 · Travel between regions
Location: prontera · X 187 / Y 87
1. Juno / Sage Academy
1,500 Zeny / trip
Suggested level: 50–99
Find monsters: yuno →
Destination: yuno · X 157 / Y 1802. Comodo town / coastal cave entrance
1,000 Zeny / trip
Suggested level: 30–75
Find monsters: comodo →
Destination: comodo · X 190 / Y 1503. Lutie town / Toy Factory entrance
1,200 Zeny / trip
Suggested level: 35–70
Find monsters: xmas →
Destination: xmas · X 143 / Y 308
Payon4 service points · 12 options · awaiting availability
Town payon · these are warp service priest locations, rather than Priest class-change NPCs.
Town NPC: Battle Pass Agent · payon →Service point 6 · Archers and beginners
Location: payon · X 172 / Y 105
1. Payon Cave entrance / Archer Guild
500 Zeny / trip
Suggested level: 15–60
Destination: pay_arche · X 41 / Y 1312. Spore forest / beginner Payon route
300 Zeny / trip
Suggested level: 10–30
Find monsters: pay_fild01 →
Destination: pay_fild01 · X 180 / Y 2003. Bigfoot forest
500 Zeny / trip
Suggested level: 25–45
Find monsters: pay_fild07 →
Destination: pay_fild07 · X 200 / Y 177
Service point 7 · Forest parties
Location: payon · X 179 / Y 100
1. Wolf forest
500 Zeny / trip
Suggested level: 20–45
Find monsters: pay_fild02 →
Destination: pay_fild02 · X 151 / Y 2192. Horn / Coco forest
500 Zeny / trip
Suggested level: 20–45
Find monsters: mjolnir_09 →
Destination: mjolnir_09 · X 188 / Y 2153. Goblin forest
750 Zeny / trip
Suggested level: 30–55
Find monsters: gef_fild11 →
Destination: gef_fild11 · X 208 / Y 190
Service point 8 · Undead hunting
Location: payon · X 193 / Y 108
1. Payon Cave entrance / Archer Guild
500 Zeny / trip
Suggested level: 15–60
Destination: pay_arche · X 41 / Y 1312. Orc Village / Orc Dungeon entrance
1,000 Zeny / trip
Suggested level: 35–65
Find monsters: gef_fild10 →
Destination: gef_fild10 · X 178 / Y 2183. Glast Heim grounds / choose your dungeon onward
2,000 Zeny / trip
Suggested level: 60–99
Find monsters: glast_01 →
Destination: glast_01 · X 200 / Y 291
Service point 9 · Travel and trading
Location: payon · X 172 / Y 96
1. Prontera town
500 Zeny / trip
Suggested level: All levels
Find monsters: prontera →
Destination: prontera · X 150 / Y 1602. Alberta port town
500 Zeny / trip
Suggested level: All levels
Find monsters: alberta →
Destination: alberta · X 91 / Y 1003. Outside Clock Tower
1,500 Zeny / trip
Suggested level: 45–99
Find monsters: aldebaran →
Destination: aldebaran · X 140 / Y 133
Geffen4 service points · 12 options · awaiting availability
Town geffen · these are warp service priest locations, rather than Priest class-change NPCs.
Town NPC: Battle Pass Agent · geffen →Service point 10 · Mages and Blacksmiths
Location: geffen · X 105 / Y 67
1. Horn / Coco forest
500 Zeny / trip
Suggested level: 20–45
Find monsters: mjolnir_09 →
Destination: mjolnir_09 · X 188 / Y 2152. Coal mine entrance
750 Zeny / trip
Suggested level: 25–60
Find monsters: mjolnir_02 →
Destination: mjolnir_02 · X 174 / Y 1933. Goblin forest
750 Zeny / trip
Suggested level: 30–55
Find monsters: gef_fild11 →
Destination: gef_fild11 · X 208 / Y 190
Service point 11 · Gather Orc parties
Location: geffen · X 111 / Y 57
1. Orc Village / Orc Dungeon entrance
1,000 Zeny / trip
Suggested level: 35–65
Find monsters: gef_fild10 →
Destination: gef_fild10 · X 178 / Y 2182. High Orc field
1,200 Zeny / trip
Suggested level: 60–99
Find monsters: gef_fild14 →
Destination: gef_fild14 · X 211 / Y 1853. Glast Heim grounds / choose your dungeon onward
2,000 Zeny / trip
Suggested level: 60–99
Find monsters: glast_01 →
Destination: glast_01 · X 200 / Y 291
Service point 12 · Wizard / dungeon hunting
Location: geffen · X 102 / Y 75
1. Outside Clock Tower
1,500 Zeny / trip
Suggested level: 45–99
Find monsters: aldebaran →
Destination: aldebaran · X 140 / Y 1332. Glast Heim grounds / choose your dungeon onward
2,000 Zeny / trip
Suggested level: 60–99
Find monsters: glast_01 →
Destination: glast_01 · X 200 / Y 2913. Field at the Magma Dungeon entrance
2,000 Zeny / trip
Suggested level: 70–99
Find monsters: yuno_fild03 →
Destination: yuno_fild03 · X 34 / Y 139
Service point 13 · Travel and ranged combat
Location: geffen · X 118 / Y 76
1. Prontera town
500 Zeny / trip
Suggested level: All levels
Find monsters: prontera →
Destination: prontera · X 150 / Y 1602. Geographer field
1,500 Zeny / trip
Suggested level: 40–70
Find monsters: yuno_fild03 →
Destination: yuno_fild03 · X 41 / Y 1403. Juno / Sage Academy
1,500 Zeny / trip
Suggested level: 50–99
Find monsters: yuno →
Destination: yuno · X 157 / Y 180
Morocc4 service points · 12 options · awaiting availability
Town morocc · these are warp service priest locations, rather than Priest class-change NPCs.
Service point 14 · Thieves and beginners
Location: morocc · X 182 / Y 103
1. Muka desert
500 Zeny / trip
Suggested level: 15–35
Find monsters: moc_fild18 →
Destination: moc_fild18 · X 209 / Y 2232. Field outside Ant Hell
500 Zeny / trip
Suggested level: 20–45
Find monsters: cmd_fild08 →
Destination: cmd_fild08 · X 328 / Y 3553. Hode / Sandman desert
750 Zeny / trip
Suggested level: 35–60
Find monsters: moc_fild16 →
Destination: moc_fild16 · X 206 / Y 228
Service point 15 · Desert hunting
Location: morocc · X 188 / Y 108
1. Morocc ruins / Pyramid entrance
1,000 Zeny / trip
Suggested level: 30–75
Destination: moc_ruins · X 62 / Y 1602. Sphinx entrance
1,000 Zeny / trip
Suggested level: 35–80
Destination: moc_fild19 · X 125 / Y 1003. Hode / Sandman desert
750 Zeny / trip
Suggested level: 35–60
Find monsters: moc_fild16 →
Destination: moc_fild16 · X 206 / Y 228
Service point 16 · Card hunting and parties
Location: morocc · X 180 / Y 113
1. Glast Heim grounds / choose your dungeon onward
2,000 Zeny / trip
Suggested level: 60–99
Find monsters: glast_01 →
Destination: glast_01 · X 200 / Y 2912. High Orc field
1,200 Zeny / trip
Suggested level: 60–99
Find monsters: gef_fild14 →
Destination: gef_fild14 · X 211 / Y 1853. Kokomo beach
1,000 Zeny / trip
Suggested level: 45–75
Find monsters: cmd_fild04 →
Destination: cmd_fild04 · X 228 / Y 194
Service point 17 · Travel between towns
Location: morocc · X 188 / Y 118
1. Prontera town
500 Zeny / trip
Suggested level: All levels
Find monsters: prontera →
Destination: prontera · X 150 / Y 1602. Alberta port town
500 Zeny / trip
Suggested level: All levels
Find monsters: alberta →
Destination: alberta · X 91 / Y 1003. Comodo town / coastal cave entrance
1,000 Zeny / trip
Suggested level: 30–75
Find monsters: comodo →
Destination: comodo · X 190 / Y 150
Alberta2 service points · 6 options · awaiting availability
Town alberta · these are warp service priest locations, rather than Priest class-change NPCs.
Town NPC: Battle Pass Agent · alberta →Service point 18 · Port towns and Merchants
Location: alberta · X 91 / Y 110
1. Byalan Island / underwater entrance
500 Zeny / trip
Suggested level: 15–65
Destination: izlu2dun · X 107 / Y 952. Payon Cave entrance / Archer Guild
500 Zeny / trip
Suggested level: 15–60
Destination: pay_arche · X 41 / Y 1313. Prontera town
500 Zeny / trip
Suggested level: All levels
Find monsters: prontera →
Destination: prontera · X 150 / Y 160
Service point 19 · Parties and exploration
Location: alberta · X 99 / Y 109
1. Kokomo beach
1,000 Zeny / trip
Suggested level: 45–75
Find monsters: cmd_fild04 →
Destination: cmd_fild04 · X 228 / Y 1942. Comodo town / coastal cave entrance
1,000 Zeny / trip
Suggested level: 30–75
Find monsters: comodo →
Destination: comodo · X 190 / Y 1503. Lutie town / Toy Factory entrance
1,200 Zeny / trip
Suggested level: 35–70
Find monsters: xmas →
Destination: xmas · X 143 / Y 308
Izlude3 service points · 9 options · awaiting availability
Town izlude · these are warp service priest locations, rather than Priest class-change NPCs.
Town NPC: Battle Pass Agent · izlude →Service point 20 · Swordmen and beginners
Location: izlude · X 112 / Y 120
1. Poring field south of Prontera
200 Zeny / trip
Suggested level: 1–20
Find monsters: prt_fild08 →
Destination: prt_fild08 · X 180 / Y 2502. Byalan Island / underwater entrance
500 Zeny / trip
Suggested level: 15–65
Destination: izlu2dun · X 107 / Y 953. Spore forest / beginner Payon route
300 Zeny / trip
Suggested level: 10–30
Find monsters: pay_fild01 →
Destination: pay_fild01 · X 180 / Y 200
Service point 21 · Beginner parties
Location: izlude · X 112 / Y 129
1. Byalan Island / underwater entrance
500 Zeny / trip
Suggested level: 15–65
Destination: izlu2dun · X 107 / Y 952. Payon Cave entrance / Archer Guild
500 Zeny / trip
Suggested level: 15–60
Destination: pay_arche · X 41 / Y 1313. Orc Village / Orc Dungeon entrance
1,000 Zeny / trip
Suggested level: 35–65
Find monsters: gef_fild10 →
Destination: gef_fild10 · X 178 / Y 218
Service point 22 · Travel between towns
Location: izlude · X 118 / Y 131
1. Prontera town
500 Zeny / trip
Suggested level: All levels
Find monsters: prontera →
Destination: prontera · X 150 / Y 1602. Alberta port town
500 Zeny / trip
Suggested level: All levels
Find monsters: alberta →
Destination: alberta · X 91 / Y 1003. Outside Clock Tower
1,500 Zeny / trip
Suggested level: 45–99
Find monsters: aldebaran →
Destination: aldebaran · X 140 / Y 133
Al De Baran3 service points · 9 options · awaiting availability
Town aldebaran · these are warp service priest locations, rather than Priest class-change NPCs.
Town NPC: Battle Pass Agent · aldebaran →Service point 23 · Clock Tower
Location: aldebaran · X 125 / Y 120
1. Outside Clock Tower
1,500 Zeny / trip
Suggested level: 45–99
Find monsters: aldebaran →
Destination: aldebaran · X 140 / Y 1332. High Orc field
1,200 Zeny / trip
Suggested level: 60–99
Find monsters: gef_fild14 →
Destination: gef_fild14 · X 211 / Y 1853. Glast Heim grounds / choose your dungeon onward
2,000 Zeny / trip
Suggested level: 60–99
Find monsters: glast_01 →
Destination: glast_01 · X 200 / Y 291
Service point 24 · Alchemists
Location: aldebaran · X 125 / Y 128
1. Coal mine entrance
750 Zeny / trip
Suggested level: 25–60
Find monsters: mjolnir_02 →
Destination: mjolnir_02 · X 174 / Y 1932. Horn / Coco forest
500 Zeny / trip
Suggested level: 20–45
Find monsters: mjolnir_09 →
Destination: mjolnir_09 · X 188 / Y 2153. Geographer field
1,500 Zeny / trip
Suggested level: 40–70
Find monsters: yuno_fild03 →
Destination: yuno_fild03 · X 41 / Y 140
Service point 25 · High-level parties
Location: aldebaran · X 116 / Y 120
1. Field at the Magma Dungeon entrance
2,000 Zeny / trip
Suggested level: 70–99
Find monsters: yuno_fild03 →
Destination: yuno_fild03 · X 34 / Y 1392. Harpy field
1,800 Zeny / trip
Suggested level: 60–99
Find monsters: yuno_fild07 →
Destination: yuno_fild07 · X 231 / Y 1743. Juno / Sage Academy
1,500 Zeny / trip
Suggested level: 50–99
Find monsters: yuno →
Destination: yuno · X 157 / Y 180
Juno2 service points · 6 options · awaiting availability
Town yuno · these are warp service priest locations, rather than Priest class-change NPCs.
Town NPC: Battle Pass Agent · yuno →Service point 26 · Sage / magic classes
Location: yuno · X 150 / Y 170
1. Geographer field
1,500 Zeny / trip
Suggested level: 40–70
Find monsters: yuno_fild03 →
Destination: yuno_fild03 · X 41 / Y 1402. Harpy field
1,800 Zeny / trip
Suggested level: 60–99
Find monsters: yuno_fild07 →
Destination: yuno_fild07 · X 231 / Y 1743. Field at the Magma Dungeon entrance
2,000 Zeny / trip
Suggested level: 70–99
Find monsters: yuno_fild03 →
Destination: yuno_fild03 · X 34 / Y 139
Service point 27 · Return to the main regions
Location: yuno · X 157 / Y 170
1. Outside Clock Tower
1,500 Zeny / trip
Suggested level: 45–99
Find monsters: aldebaran →
Destination: aldebaran · X 140 / Y 1332. Prontera town
500 Zeny / trip
Suggested level: All levels
Find monsters: prontera →
Destination: prontera · X 150 / Y 1603. Glast Heim grounds / choose your dungeon onward
2,000 Zeny / trip
Suggested level: 60–99
Find monsters: glast_01 →
Destination: glast_01 · X 200 / Y 291
Comodo2 service points · 6 options · awaiting availability
Town comodo · these are warp service priest locations, rather than Priest class-change NPCs.
Town NPC: เปลี่ยนอาชีพ Bard →Service point 28 · Bard / Dancer / coast
Location: comodo · X 189 / Y 149
1. Kokomo beach
1,000 Zeny / trip
Suggested level: 45–75
Find monsters: cmd_fild04 →
Destination: cmd_fild04 · X 228 / Y 1942. Byalan Island / underwater entrance
500 Zeny / trip
Suggested level: 15–65
Destination: izlu2dun · X 107 / Y 953. Payon Cave entrance / Archer Guild
500 Zeny / trip
Suggested level: 15–60
Destination: pay_arche · X 41 / Y 131
Service point 29 · Travel and party gathering
Location: comodo · X 198 / Y 154
1. Prontera town
500 Zeny / trip
Suggested level: All levels
Find monsters: prontera →
Destination: prontera · X 150 / Y 1602. Alberta port town
500 Zeny / trip
Suggested level: All levels
Find monsters: alberta →
Destination: alberta · X 91 / Y 1003. Glast Heim grounds / choose your dungeon onward
2,000 Zeny / trip
Suggested level: 60–99
Find monsters: glast_01 →
Destination: glast_01 · X 200 / Y 291
Lutie1 service points · 3 options · awaiting availability
Town xmas · these are warp service priest locations, rather than Priest class-change NPCs.
Town NPC: Battle Pass Agent · xmas →Service point 30 · Toy Factory and return travel
Location: xmas · X 137 / Y 119
1. Lutie town / Toy Factory entrance
1,200 Zeny / trip
Suggested level: 35–70
Find monsters: xmas →
Destination: xmas · X 143 / Y 3082. Outside Clock Tower
1,500 Zeny / trip
Suggested level: 45–99
Find monsters: aldebaran →
Destination: aldebaran · X 140 / Y 1333. Prontera town
500 Zeny / trip
Suggested level: All levels
Find monsters: prontera →
Destination: prontera · X 150 / Y 160
The table's 30 locations are planned service points. Adventure bots, party bots and priests share bot capacity according to activity periods. Personal helpers and service stores belong to another group. These types must not be added together and described as human players.